If you think brewing barista-level coffee at home is only for the pros—think again. You don’t need a fancy setup, expensive training, or years of experience to make cafe-quality coffee. All you need is the right coffee maker, a few insider tricks, and a step-by-step guide on how to use a coffee maker.
In this guide, we’ll break down exactly how to use a coffee maker like a seasoned barista—no experience required. Whether you’re a total beginner or someone looking to upgrade your morning brew, you’ll learn how to get rich flavor, perfect strength, and a flawless pour—right from your kitchen counter.
Ready to ditch mediocre coffee for good? Let’s get brewing.
Step-by-Step Guide on How to Use a Coffee Maker

Learn how to use the Coffee Machine and what you need before you start?
Before pulling your first shot of Coffee maker, ensure you have the right tools in place. Great Coffee maker starts with excellent preparation, and every element matters:
Coffee Maker:
- Choose a machine that matches with your skill level (manual, semi-automatic, or automatic).
Burr Grinder
- A good burr grinder ensures a consistent, finely ground essential for proper extraction. Blade grinders won’t cut it.
Fresh Coffee Beans
- Use freshly roasted, high-quality beans. Espresso roasts or medium-dark blends work best.
Tamper
- A sturdy, properly sized tamper helps evenly compress your coffee grounds in the portafilter.
Filtered Water
- Clean, mineral-balanced water protects your machine and improves the taste of your coffee.
Scale (Optional but Helpful)
- A digital scale helps measure grounds and yield consistent results every time.
Milk Jug (If Making Milk Drinks)
- A stainless steel milk pitcher is perfect for steaming and pouring silky microfoam.
Before you pull your first shot, make sure you have the right tools in place. Great coffee maker starts with great preparation, and every element matters.
Learn more about the different types of coffee machine
Dialing In: Grind Size and Dose Matter Most
If coffee maker brewing had a golden rule, it would be this: grind size and dose are everything.
Even the best coffee maker can’t compensate for poorly ground or mismeasured coffee.
Here’s how to dial it in for a consistently great, rich coffee.
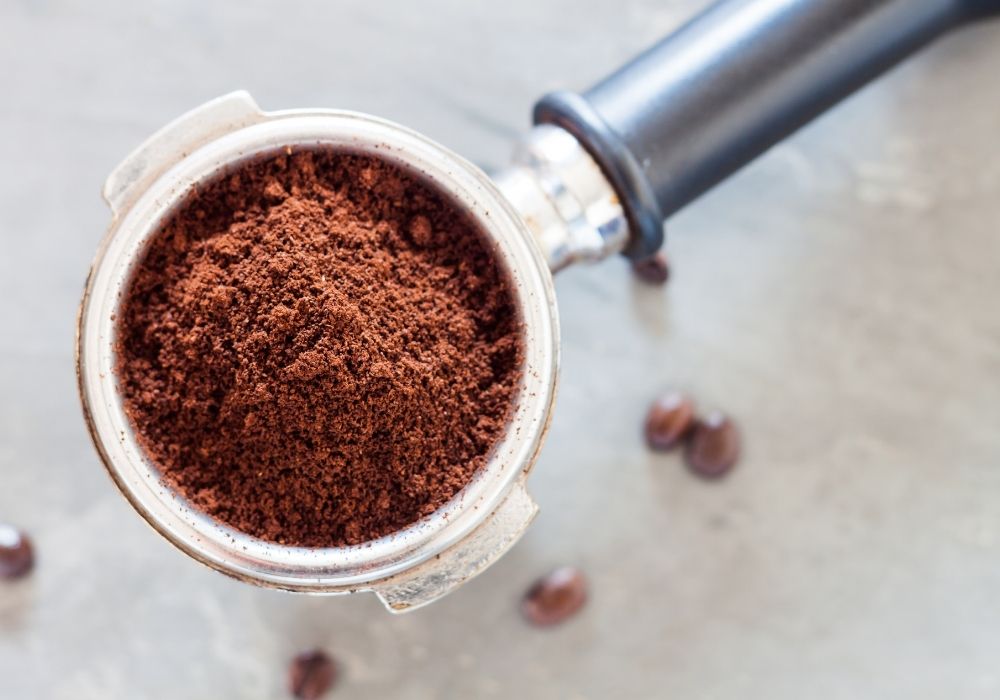
Grind Size
Coffee maker requires a fine and right grind size, almost like table salt, but not powdery.
- Too coarse = weak, sour, under-extracted shot
- Too fine = bitter, over-extracted, slow shot
- Aim for a short time of 25–30 seconds for a double espresso (from the first drip to the last)
Dose (Amount of Coffee Used)
- Most double shots use 18–20 grams of ground coffee. Use a digital scale to control the amount.
- Weigh the dose going in and the espresso drink coming out (called the yield).
Coffee-to-Water Ratio
- A great starting point is a 1:2 ratio (e.g., 18g coffee → 36g espresso).
- Want stronger? Try a 1:1.5 ratio (ristretto).
- Want milder? Go 1:2.5 or more (lungo).
Pro Tip: If your shot is running too fast or slow, adjust the grind before anything else. One small tweak can completely change the flavor!
Prepping the Coffee Maker: Warming Up & Cleaning
Before pulling a shot, your coffee maker needs to be warmed up and cleaned just like a chef preheats the oven before baking.
Skipping this step can lead to poor temperature stability and off-flavors.
Why Preheating Matters
- A cold machine can drop the brewing temperature, leading to sour, under-extracted shots.
- Let your machine heat up for at least 10–15 minutes (some pros leave theirs on all day).
- Warm your portafilter and cups before they get too cold. Metal or ceramic can cool down your coffee maker quickly.
Flushing the Group Head
- Run hot water through the group head for a few seconds before each shot.
- This clears out old coffee residue and stabilizes the brew temperature.
Bonus: it ensures consistent water flow for a cleaner, more balanced extraction.
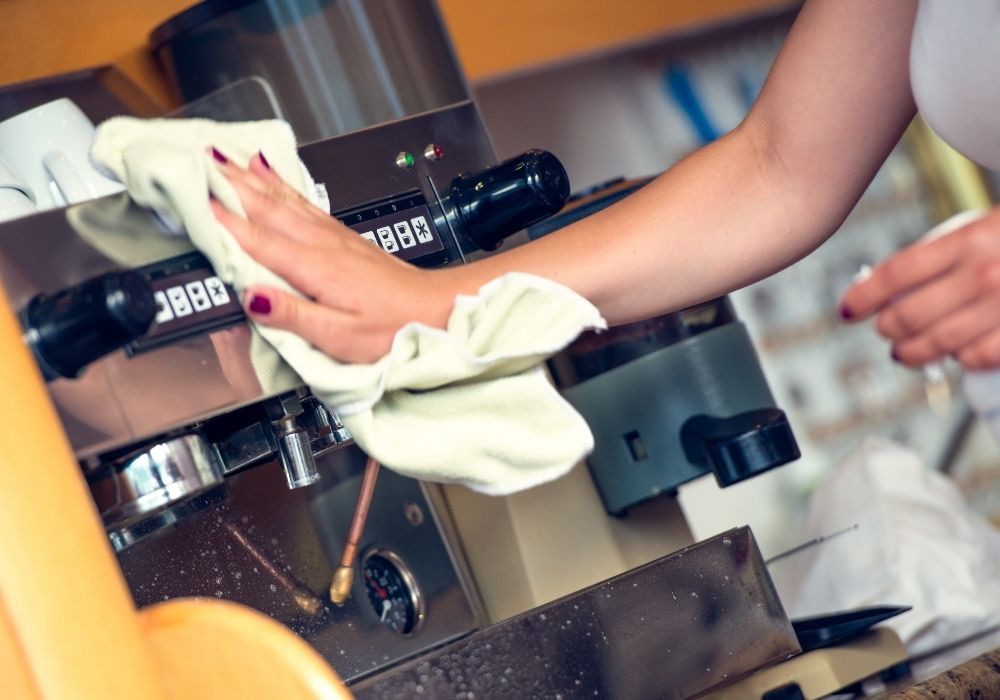
Check for Cleanliness
- Allow your stovetop coffee maker time to cool before you break it down for cleaning.
- Make sure there’s no leftover coffee in the basket or on the portafilter.
- Wipe the group head with a damp cloth if needed.
- A clean machine not only makes better coffee, but it lasts longer, too.
Pro Tip: Prepping your machine properly adds just 1–2 minutes to your routine but makes every shot taste like it came from a real cafe. Totally worth it.
How to Pull the Perfect Coffee Shot
Pulling the perfect coffee shot is the core of making high-quality coffee at home.
Here’s how to do it step by step:
Step 1: Grind Fresh Coffee
Use a burr grinder to finely ground coffee whole beans into table salt–like consistency.
For a double shot, aim for 18–20 grams of ground coffee.
Step 2: Dose and Distribute
Weigh your dose of coffee with a digital scale.
Distribute grounds evenly in the portafilter to avoid channeling (uneven water flow).
Step 3: Tamp Firmly and Evenly
Hold your tamper level and press down with firm, even pressure (around 30 lbs).
The puck should be flat and compact, avoiding tilts or loose edges.
Step 4: Flush the Group Head
Run hot water through the group head for 2–3 seconds to clear old coffee and stabilize the temperature.
Step 5: Insert the Portafilter and Start Extraction
Lock the portafilter into the group head, and finally, select your brew cycle settings.
A good coffee should begin dripping slowly, then develop into a smooth, steady stream.
Step 6: Time and Monitor Your Shot
The ideal extraction time is 25–30 seconds for a double shot.
You should yield around 36–40 grams of coffee from an 18–20g dose (a 1:2 ratio).
Adjust your grind if the shot is too fast (coarse) or too slow (fine).
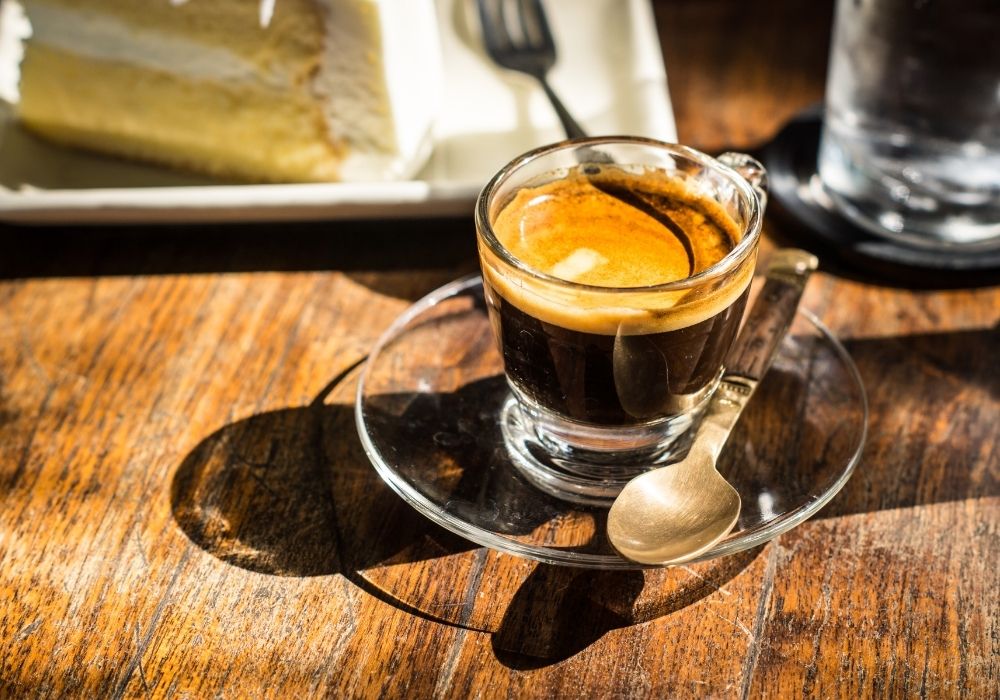
Step 7: Evaluate the Crema
A golden, caramel-colored crema indicates a well-extracted shot.
Thin or pale crema often means under-extraction, dark or bitter crema could signal over-extraction.
Pro Tip: Track grind size, dose, time, and yield to replicate your best results and fine-tune your technique.
Learn more about the benefits of using the Coffee Maker
Steaming and Texturing Milk Like a Barista
Mastering milk steaming for milk-based coffee is what transforms a good coffee into a great latte, cappuccino, or flat white.
The goal?
Silky-smooth microfoam milk with tiny, even bubbles that blend beautifully with coffee and pours like velvet, as you find in coffee shops.
Here’s how to do it right:
Step 1: Start with Cold, Fresh Milk
Use whole milk for the best texture and natural sweetness.
Fill your milk jug no more than halfway; milk expands when steamed.
Step 2: Purge the Steam Wand
Before steaming, briefly open the steam wand to release any trapped water.
This prevents water from diluting your milk.
Step 3: Position the Wand Correctly
Position the tip of the wand just below the milk’s surface and slightly off-center for best results.
Tilt the jug to create a gentle whirlpool motion.
Step 4: Introduce Air (Stretching Phase)
Turn on the steam and lower the jug slightly so the wand tip sits near the surface.
You should hear a soft “tss-tss” sound—this is air being incorporated.
Do this for 3–5 seconds to create a thin layer of foam.
Step 5: Heat and Texture (Rolling Phase)
Raise the jug to submerge the tip again.
Let the milk spin in a whirlpool to break up bubbles and create a silky texture.
Stop steaming once the jug is warm to the touch (~55–65°C / 130–150°F).
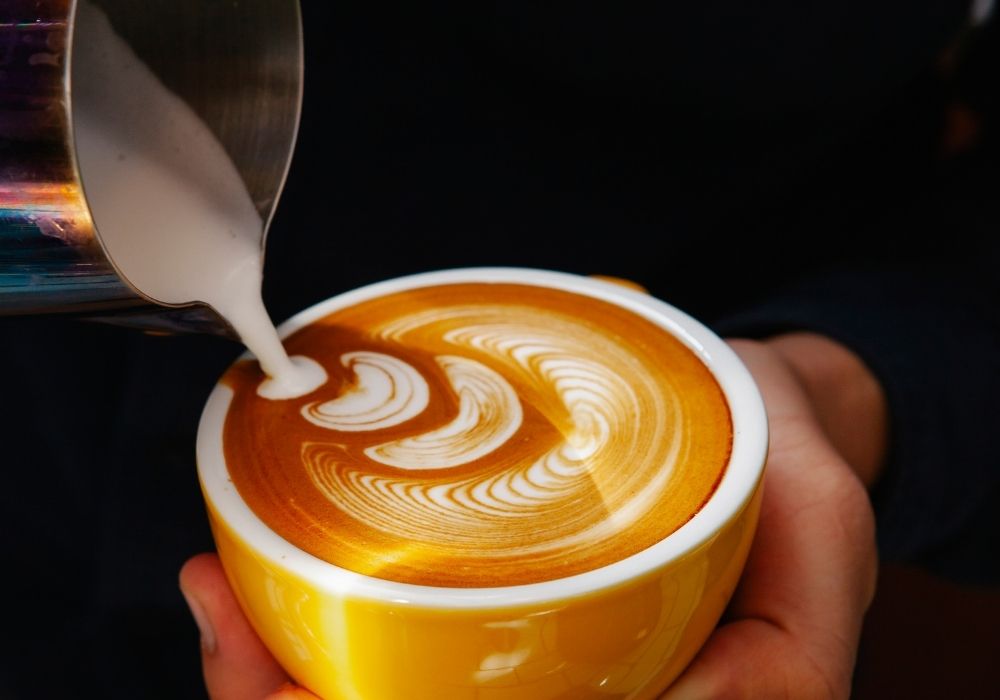
Step 6: Polish and Pour
Tap the jug lightly on the counter and give it a gentle swirl to disperse large bubbles.
The milk should look glossy and smooth, like wet paint.
Add milk immediately over coffee for the best texture and presentation.
Pro Tip: Practice steaming milk on its own and mix it with water until you become comfortable with the technique. Once you’re comfortable, you can start trying latte art.
Common Coffee Making Mistakes (And How to Fix Them)

Even experienced home baristas occasionally pull a less-than-perfect shot.
Understanding the most common espresso mistakes and how to correct them will save you time, beans, and frustration.
Here’s how to diagnose and fix the most frequent issues:
Problem 1: Shot Tastes Bitter or Burnt
Likely Cause: Over-extraction
Fix:
- Grind coarser
- Reduce brew time (aim for 25–30 seconds)
- Lower water temperature if your machine allows (ideal is ~92–96°C / 195–205°F)
Problem 2: Shot Tastes Sour or Weak
Likely Cause: Under-extraction
Fix:
- Grind finer
- Increase brew time
- Make sure your machine is fully preheated
Ensure you’re using the correct dose (18–20g for a double shot)
Problem 3: Watery Shot with No Crema
Likely Cause: Old or low-quality beans or too coarse a grind
Fix:
- Use high-quality and freshly ground coffee beans (ideally roasted within 2–3 weeks)
- Adjust to a finer coffee grind size
- Increase the dose slightly and tamp evenly
Problem 4: Uneven Flow or Spraying
Likely Cause: Channeling (water finds weak spots in the puck)
Fix:
- Distribute grounds evenly before tamping
- Use a WDT tool or shake/tap to level the grounds
- Ensure flat, even tamp pressure
- Avoid cracks or gaps in the puck
Problem 5: Coffee Extracts Too Fast or Too Slow
Fast shot (<20 sec) = Grind too coarse or under-dosed
Slow shot (>35 sec) = Grind too fine or over-dosed
Fix: Adjust grind and dose in small increments. Use a timer and scale to stay consistent.
Quick Tips for Better Shots
- Purge your machine before every shot
- Always use filtered water
- Keep your grinder and portafilter clean
- Track your settings and changes in a coffee journal
With a bit of patience and attention to detail, you’ll be able to pull a consistent, cafe-style cup of coffee.
Cleaning and Maintenance After Brewing

Essential daily habits to keep your machine running like new
Keeping your coffee maker clean isn’t just about hygiene, it directly affects taste and machine longevity.
A well-maintained machine will brew better, last longer, and save you money on repairs.
Daily Cleaning Checklist:
- Purge the steam wand immediately after use to prevent milk buildup.
- Use a rough cloth to wipe the wand and keep it clean.
- Rinse the portafilter and basket after every shot.
- Wipe the group head to remove leftover grounds.
- Take out the drip tray and water tank, and rinse them with fresh water.
Weekly Maintenance:
- Backflush with water (and detergent if your machine allows it).
- Clean the shower screen and group head gasket.
- Soak the portafilter and baskets in hot water + espresso cleaner.
Monthly or As Needed:
- Describe your machine if you have hard water (every 1–3 months).
- Clean the burr grinder to remove oil and residue from the beans.
Tip: Always refer to your coffee maker’s manual for accurate information. Some components may be dishwasher-safe, while others require specific cleaners.
Pro Tips for Consistent, Great-Tasting Coffee at Home

Simple Tips for Making Great Coffee at Home Every Time
Here are a few easy tips to help you enjoy delicious, consistent coffee:
- Use Fresh Coffee Beans – Always choose fresh, high-quality beans.
- Grind Just Before Brewing – Freshly ground coffee gives better flavor.
- Use the Right Grind Size – Fine, even grounds work best for great coffee.
- Tamp Evenly – Press the coffee flat and level in the portafilter to get a smooth coffee shot.
- Preheat Your Machine – Heat your coffee maker and cup a little before making coffee.
- Clean Regularly – To make yummy coffee every time, you need to keep your coffee maker clean and working well!
Final Thought
Using an coffee maker lets you make more than just regular drip coffee; it turns each cup into a unique experience.
From selecting the right beans and grind to choosing your ideal roast, every detail helps create a better and perfect brew.
Using steam, pressure, and the right coffee grinder, you can explore with different coffee styles and brew a smooth, bold coffee beverage at home.
Whether sourced from your favorite roaster or freshly ground in your kitchen, great espresso coffee can be made with great technique.
FAQs
Q. What kind of ground coffee is needed for coffee machines?
Ans. Fine-ground coffee is ideal for coffee machines, similar in texture to table salt, to ensure proper pressure and rich flavor extraction.
Q. How do you choose the perfect coffree Grinder?
Ans. Choose a burr grinder with fine grind settings, precise controls, and consistent output, which are essential for rich, balanced coffee shots.
Q. What is the best coffee for Americanos?
Ans. Medium or dark roast coffee with a smooth, bold flavor works best for Americanos.
Q. Can you make an espresso shot in a coffee maker?
No, standard coffee makers can’t make true espresso; they lack the pressure needed. Use an espresso machine for authentic results.